
It’s easy to lose track of a single media file when it’s buried under a pile of screenshots, memes, and random photos from your camera roll. With today’s high-quality smartphone cameras, snapping away is almost irresistible. But without a solid system for organizing your images, things quickly get messy.
That’s where tools like Google Photos come in. Even if you’re not fully bought into the Google ecosystem, its photo management features stand out. Built-in gallery apps from phone manufacturers also offer solid tools—like duplicate detection, face grouping, location tagging, and smart albums—that help you keep things organized.
Here’s how these features can help turn your chaotic gallery into something that actually works for you.
1- Create smart albums
Albums in photo apps today are more intelligent and responsive than ever. With smart search features, you can find images using keywords, dates, or even visual elements within the photo. These tools can recognize objects, scenes, locations, and even text. They also automatically scan for faces.
Once a person is identified, you can create an album for them and set it to automatically include any new photos they appear in—no need for manual sorting. The album updates quietly in the background. Similar features are also available in built-in gallery apps like Samsung’s, offering users flexibility in how they manage and organize their media.
ALSO READ : How to Enable Collections feature of Play Store in your rooted Android device
Turn on face grouping in Google Photos
- Open Google Photos.
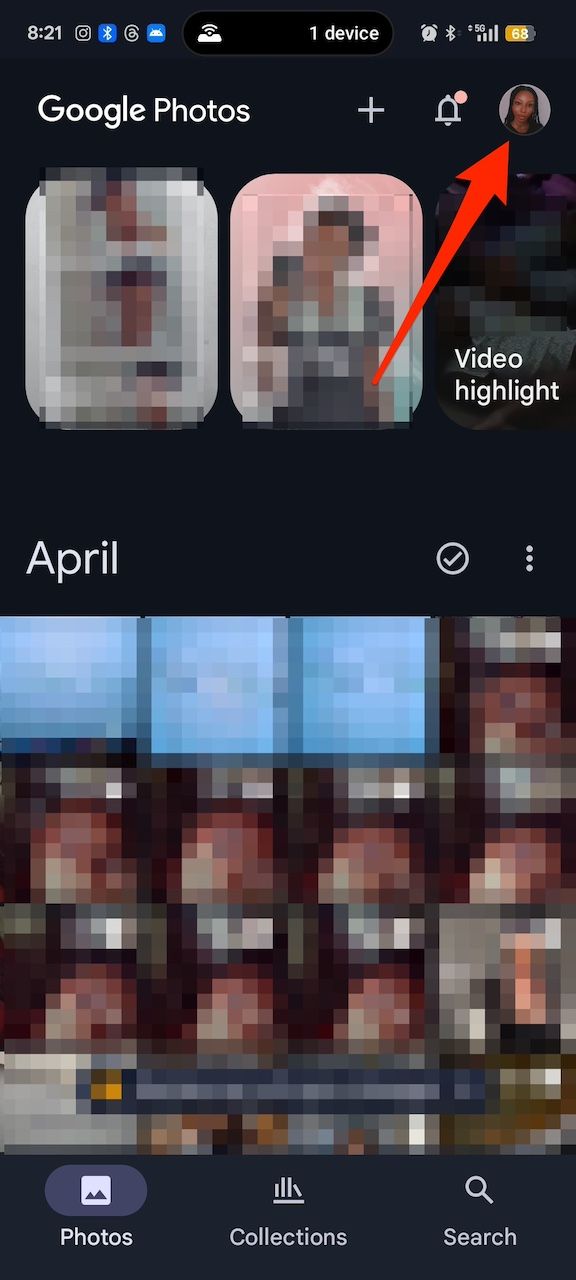
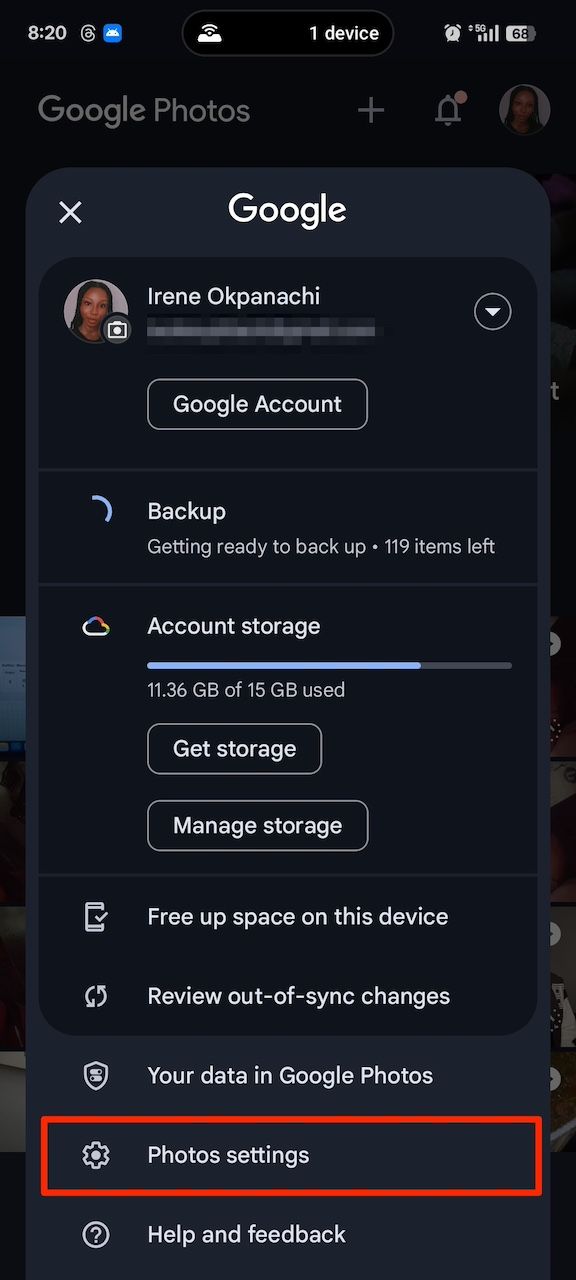
- Tap your account picture in the upper-right corner.
- Select Photos settings.
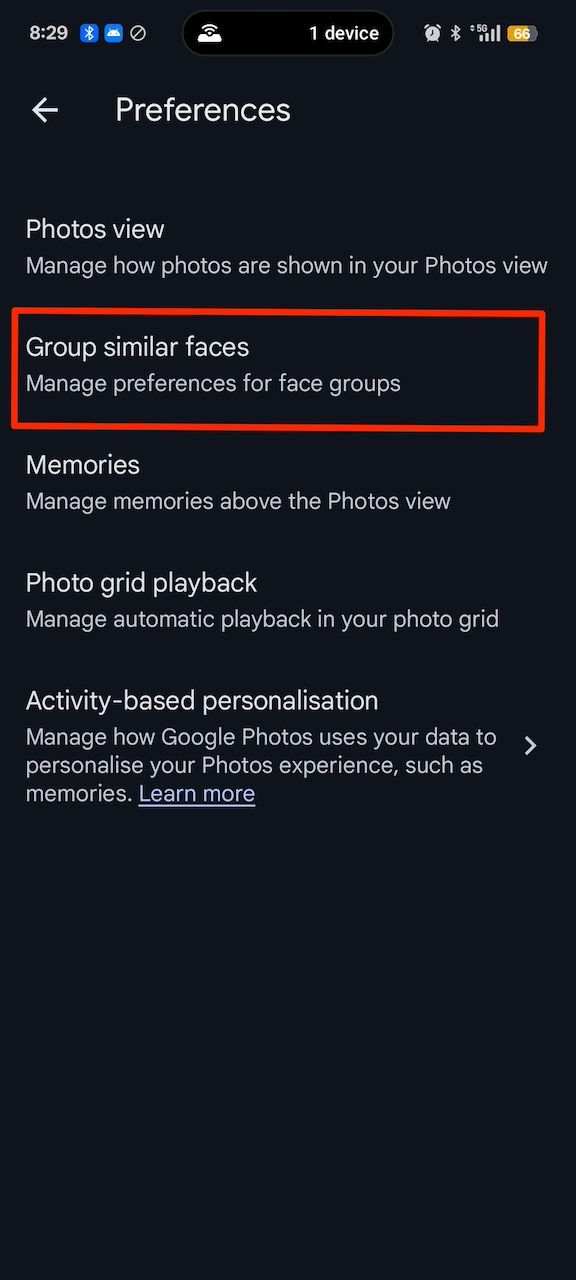
- 4. Go to Preferences > Group similar faces.
- 5. Tap the Face groups toggle button.
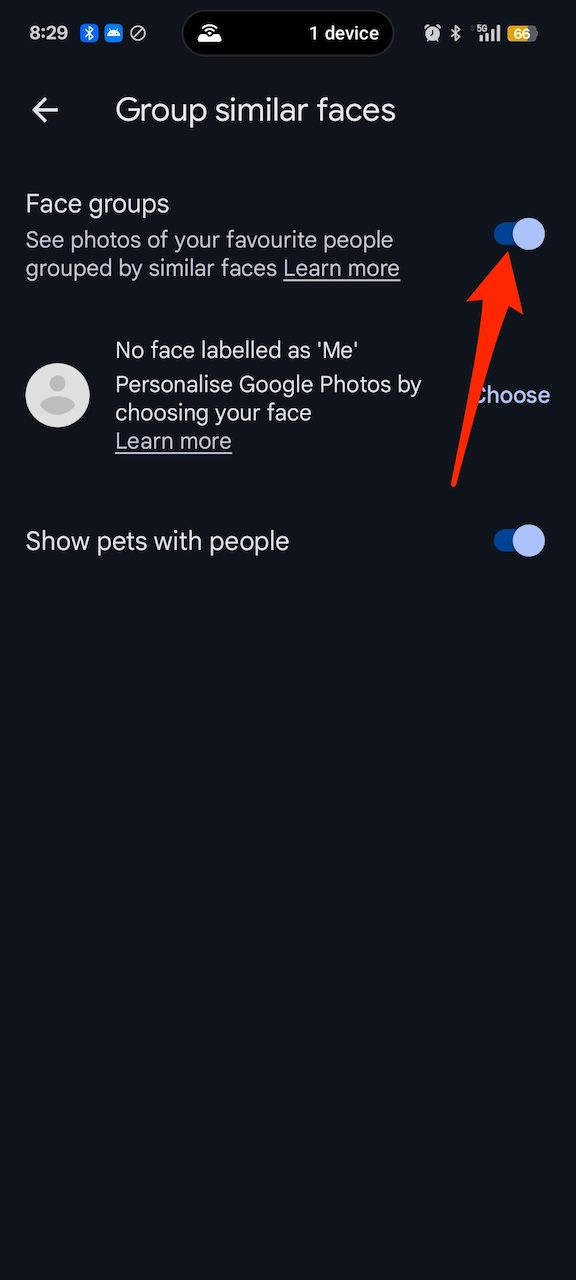
It may take a while for Photos to identify and group faces. Check back to manage people or enter the Collections menu. You will see a tab labeled People.
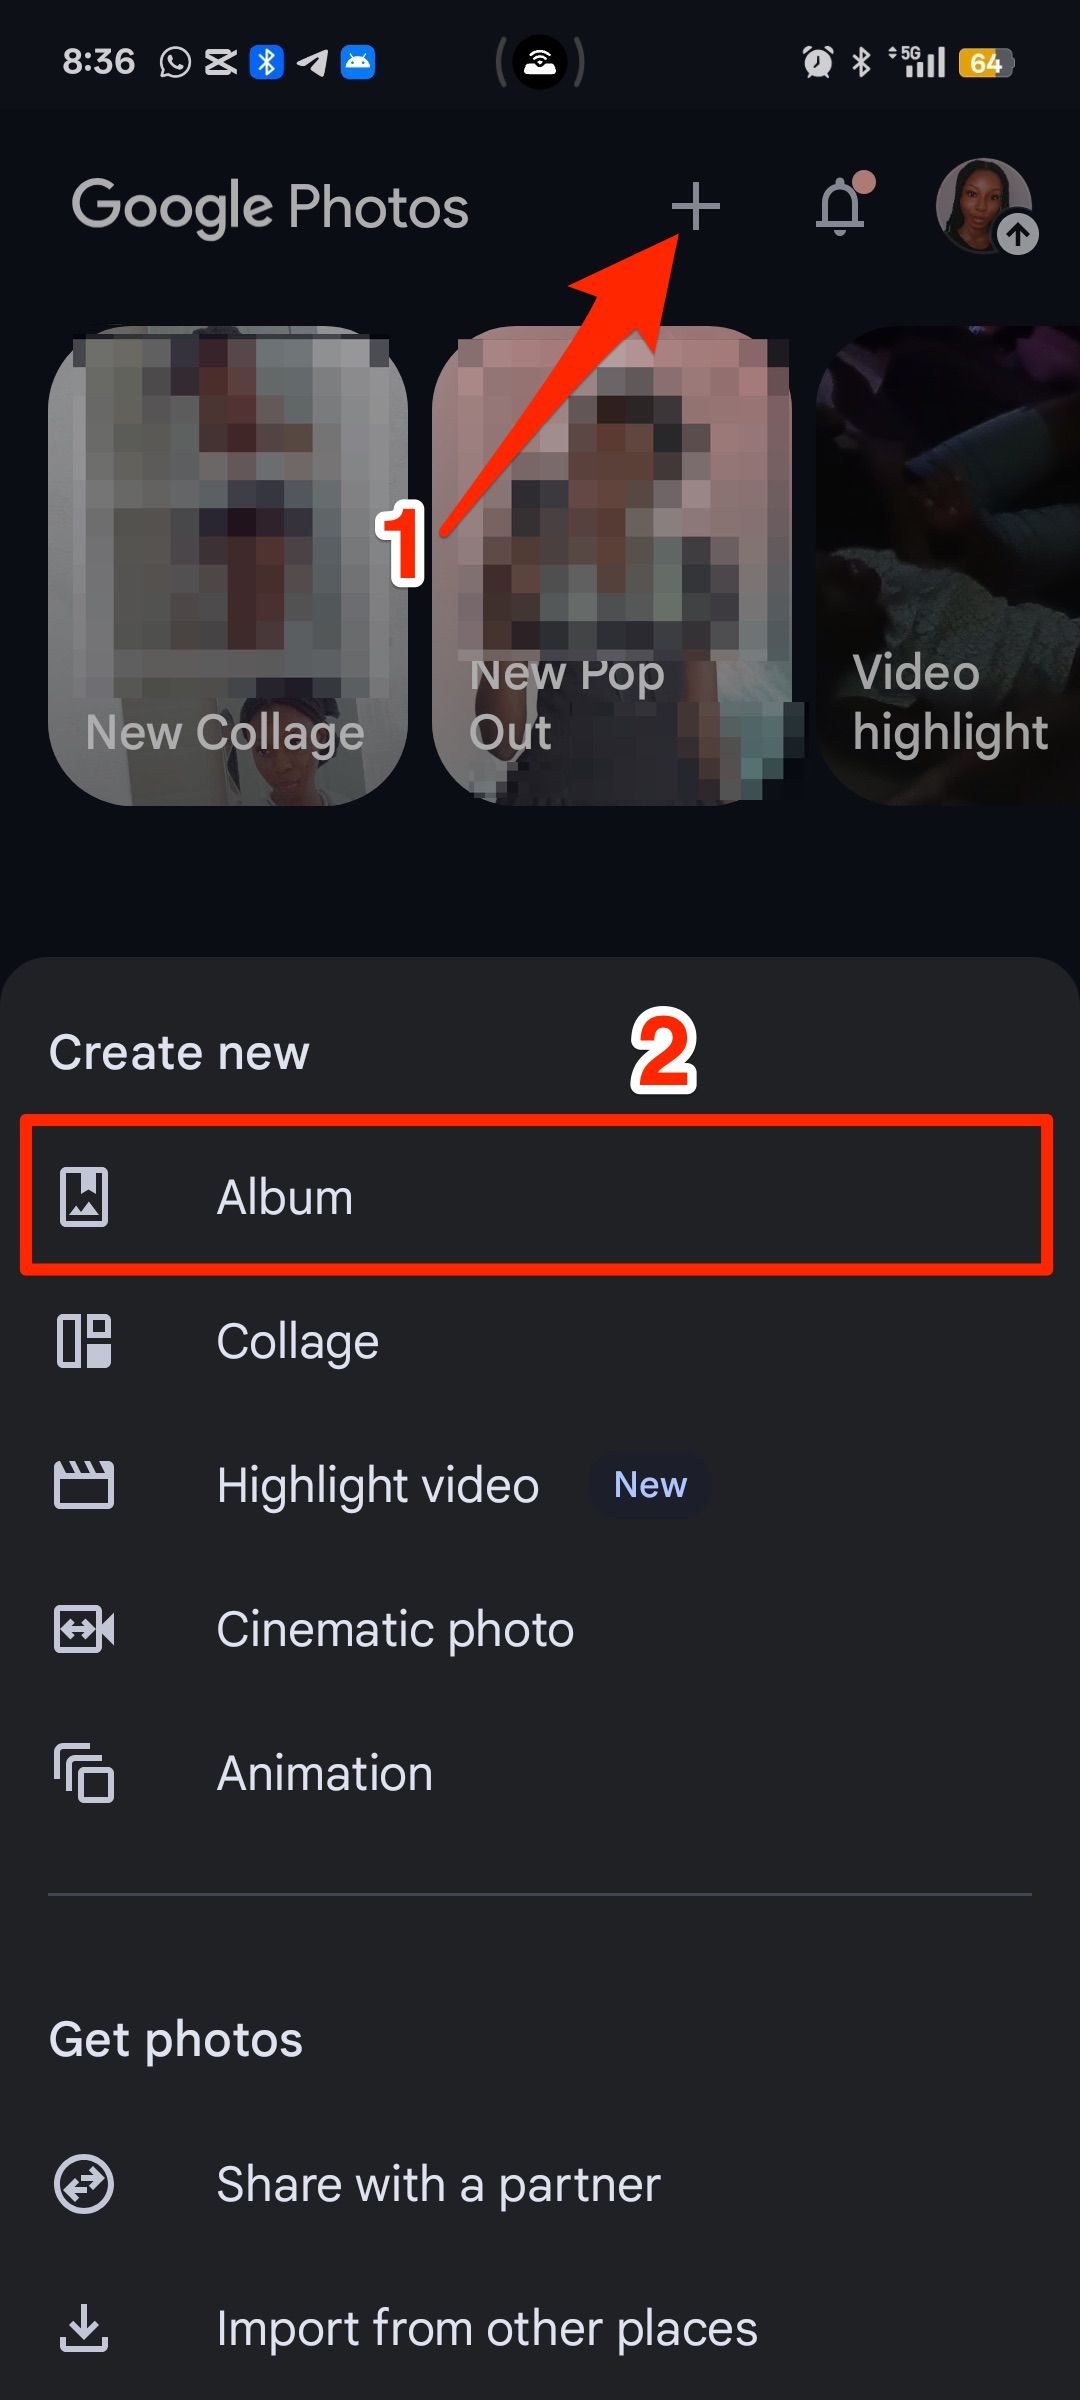
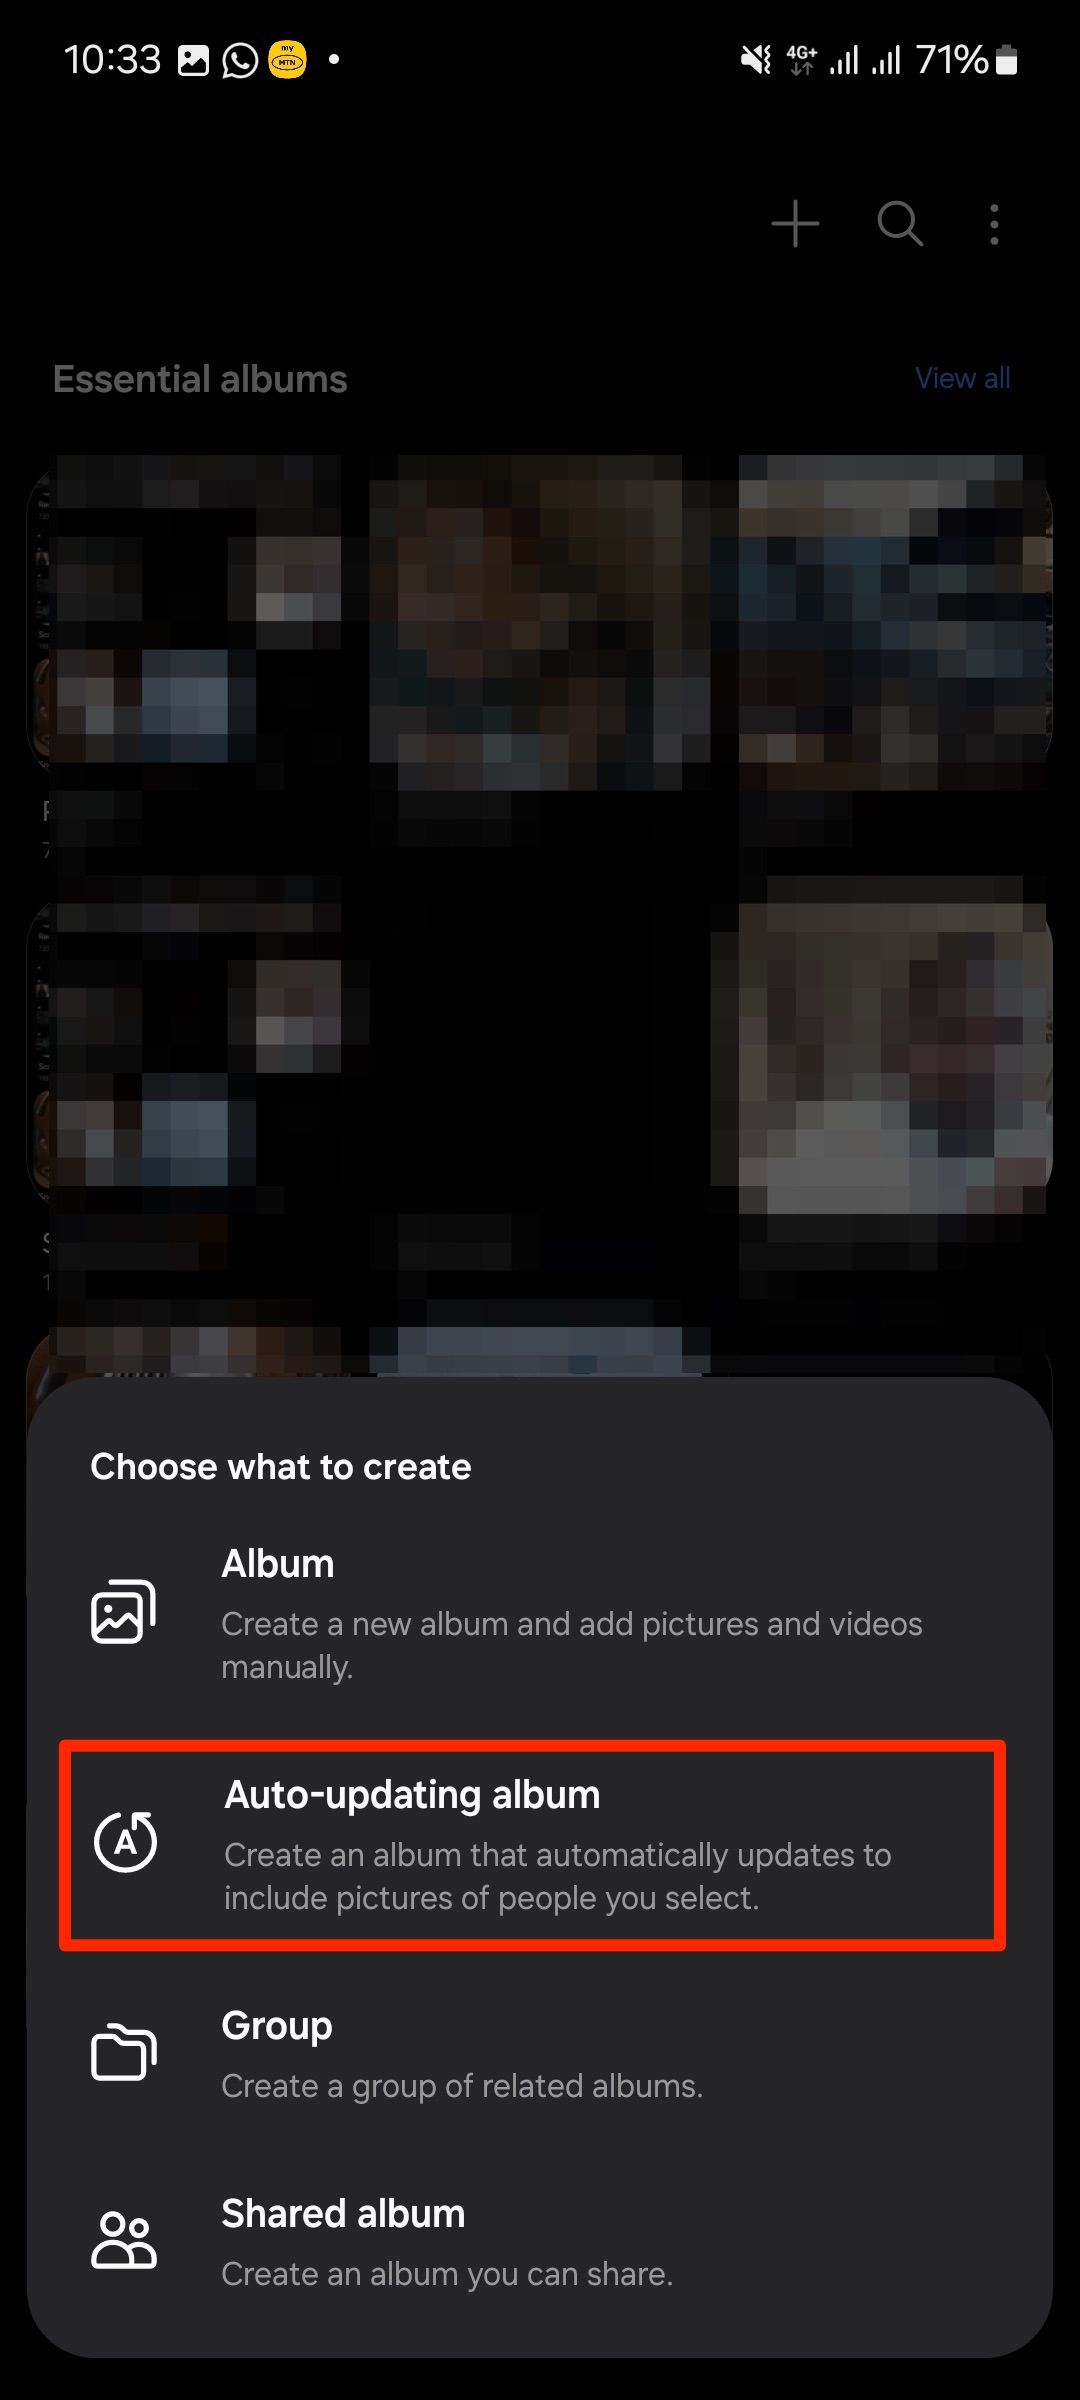
Create albums in Google Photos
- Tap + at the top of the app.
- Select Album.
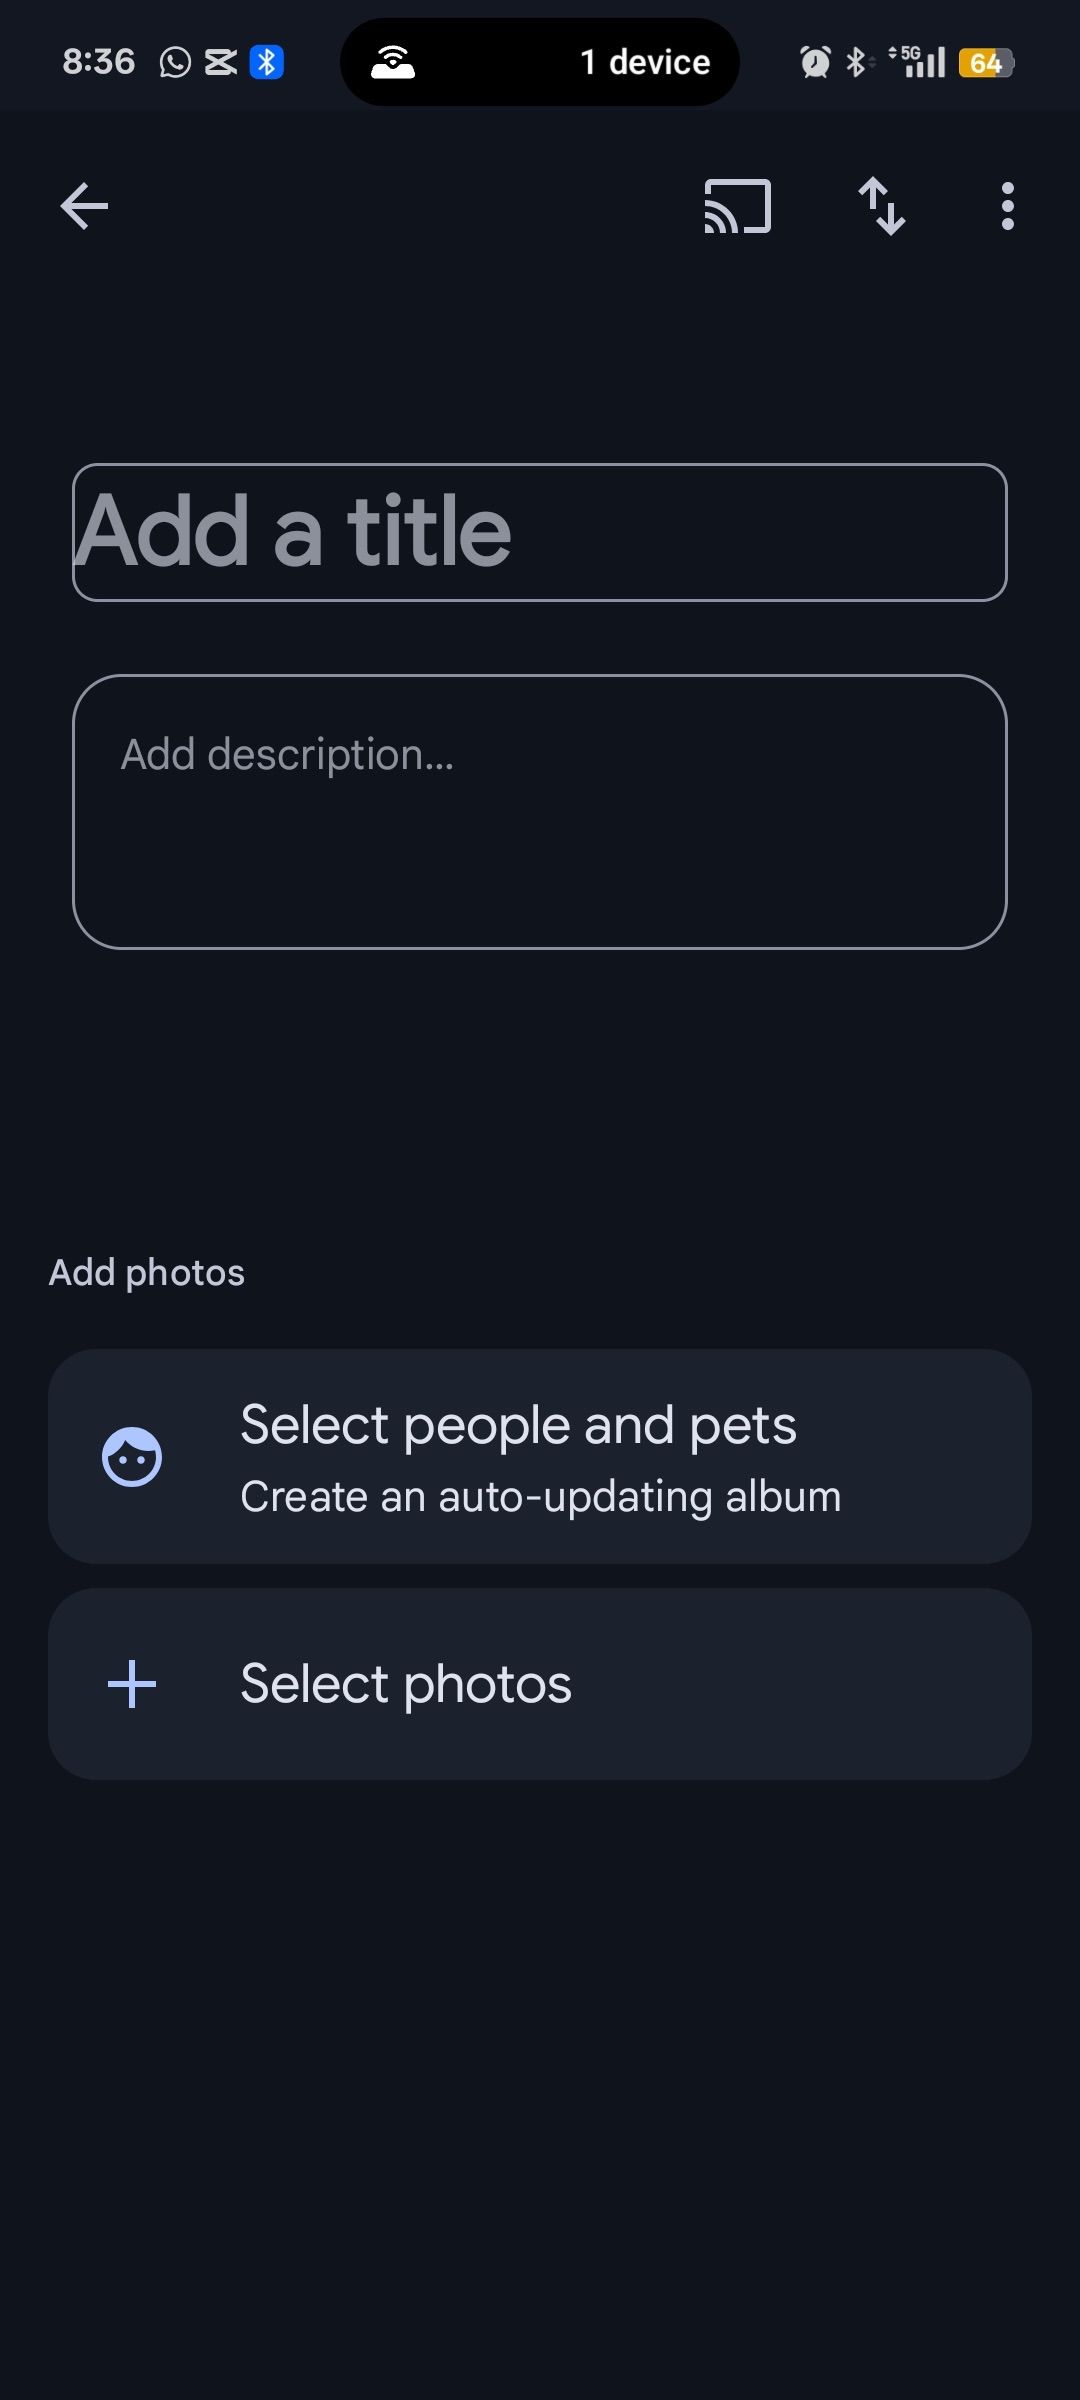
- Give your album a title and description.
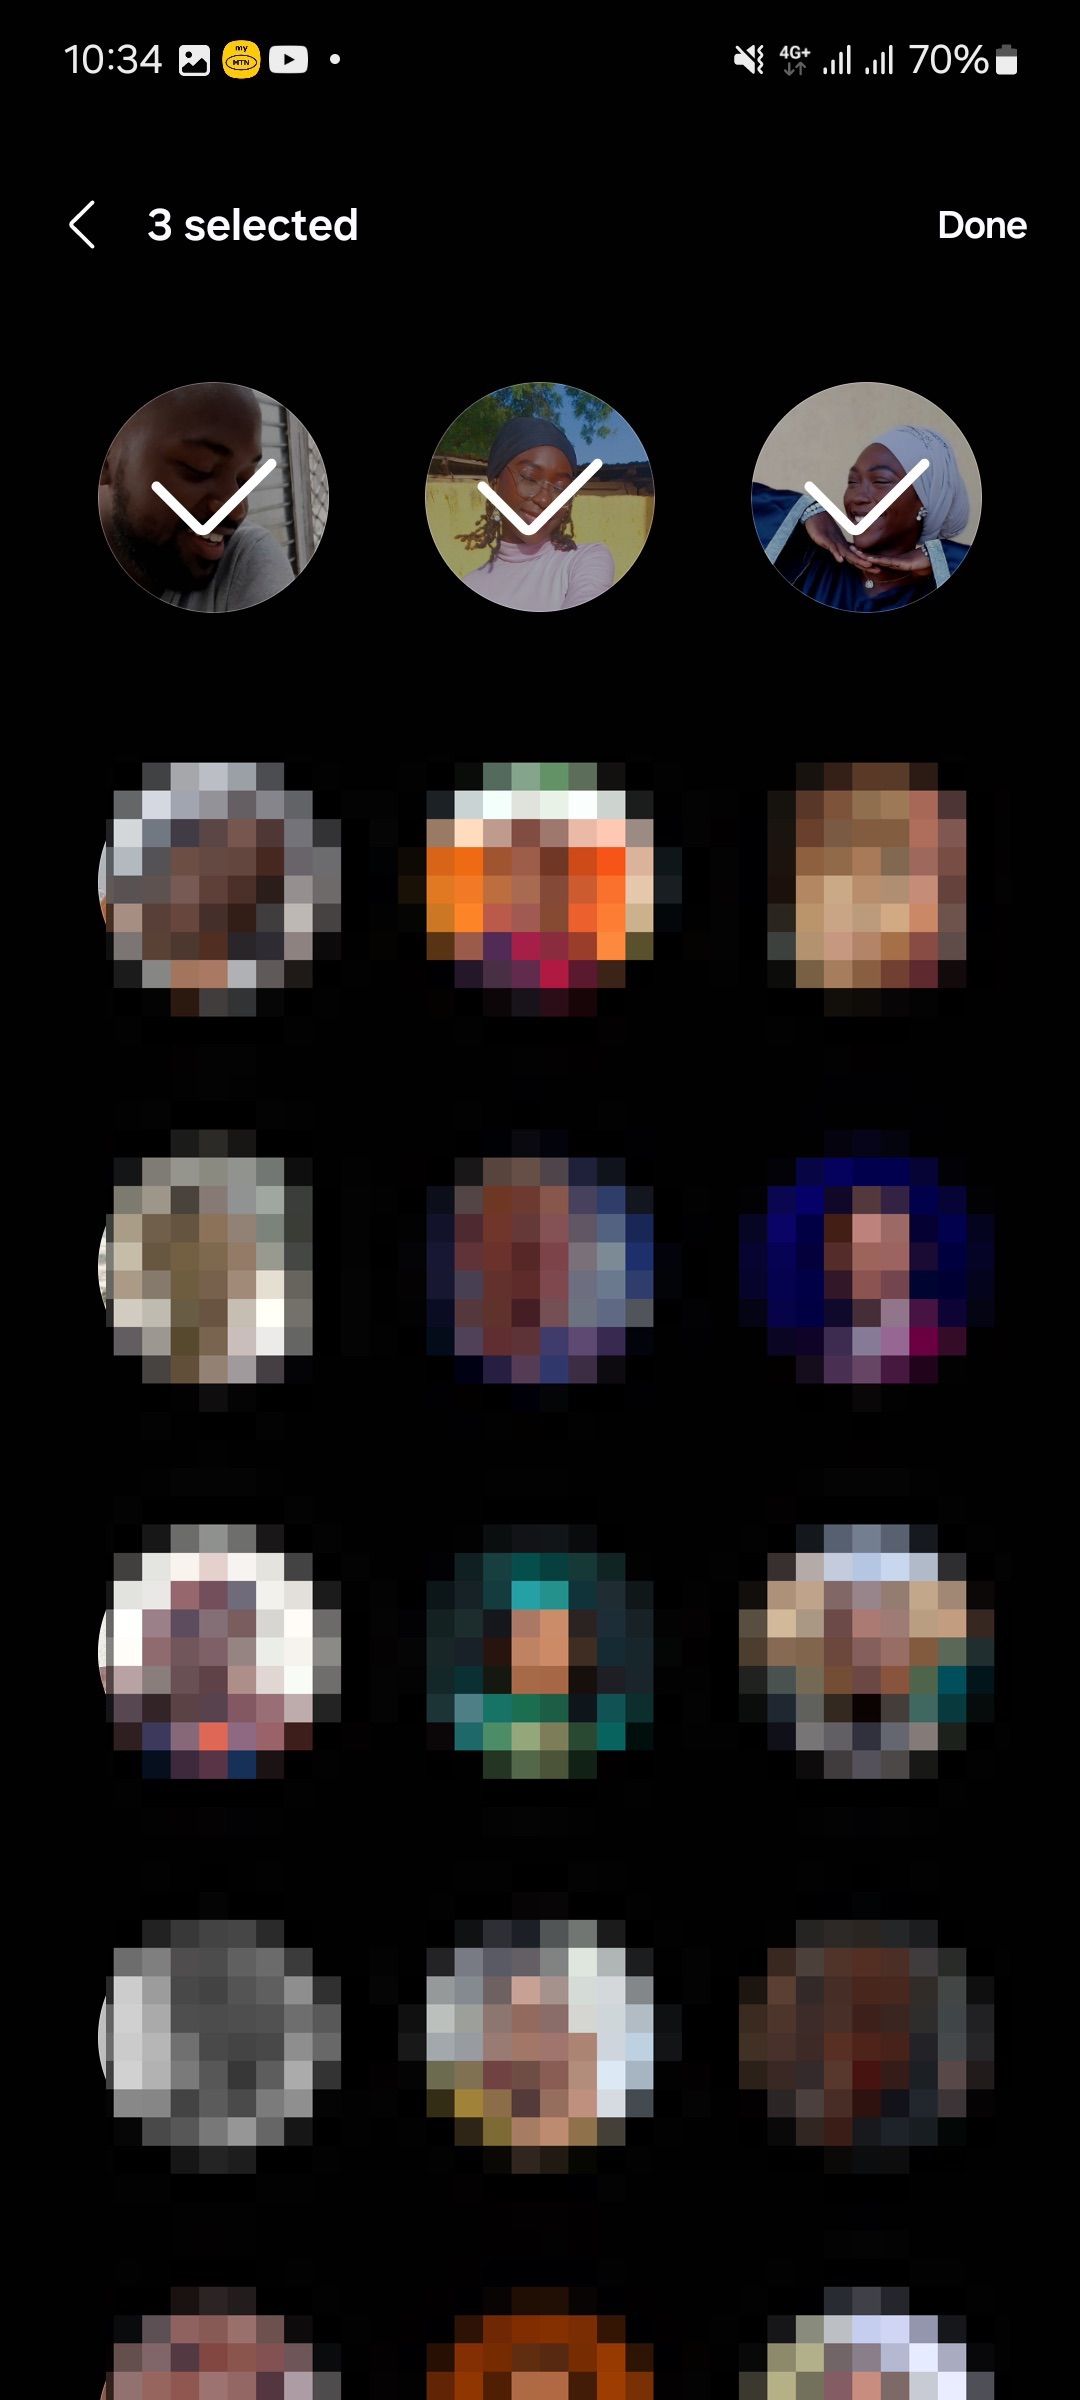
- Choose to auto-add photos of people and objects or select media files yourself.
- If you choose to create an auto-updating album, turn on notifications. Check the provided box when selecting people to do it.
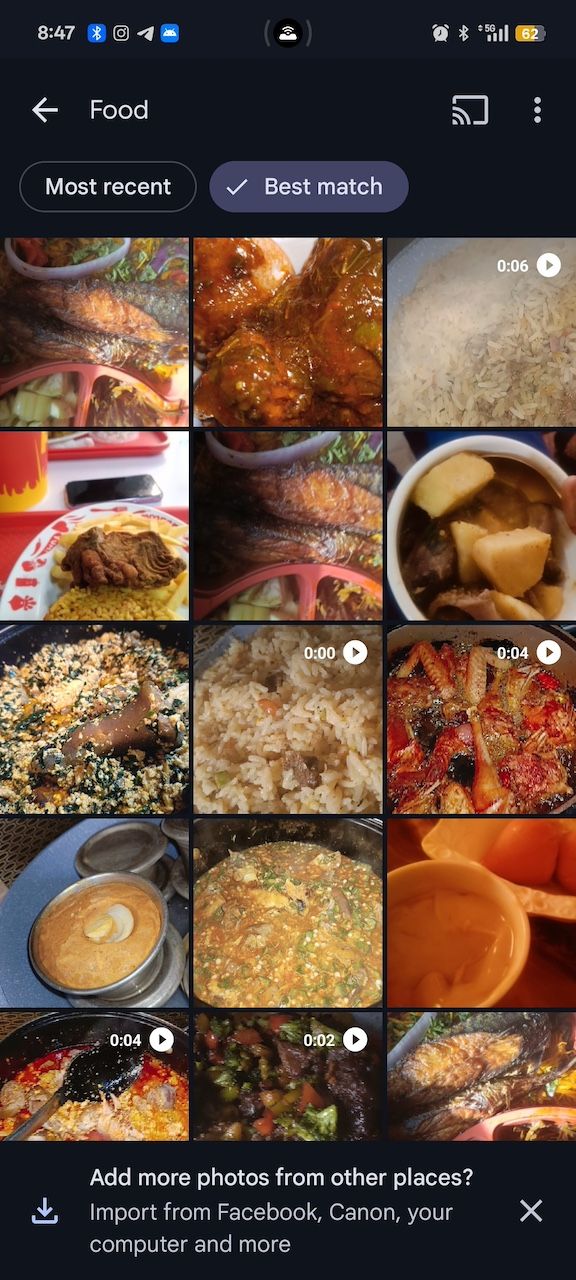
Organize images and videos with Google Photos’ search bar
- Tap Search in the lower-right corner.
- Enter a keyword into the search bar at the top of the app. For this tutorial, we use Food.
- Long press images or videos to select them.
- Tap + in the upper-right corner.
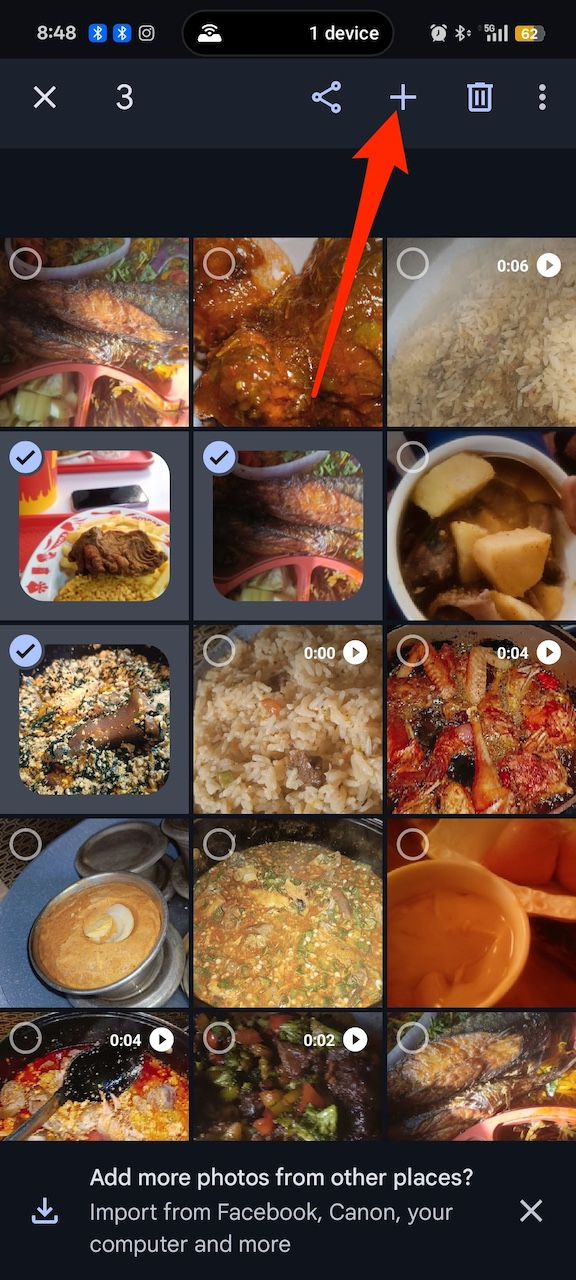
- 5. Select Album.
- 6. Give your album a name and description.
- 7. Tap the check mark in the upper-left corner to save the changes.
Create auto-updating albums in Samsung Gallery
- Open Samsung Gallery.
- Tap Albums at the bottom of the app.
- Tap + and select Auto-updating album. You can also select Album to create a standard version.
- Give the album a name. Then tap Create.
- Select people to include in the album. Then tap Done.
2- Stack photos in Google Photos
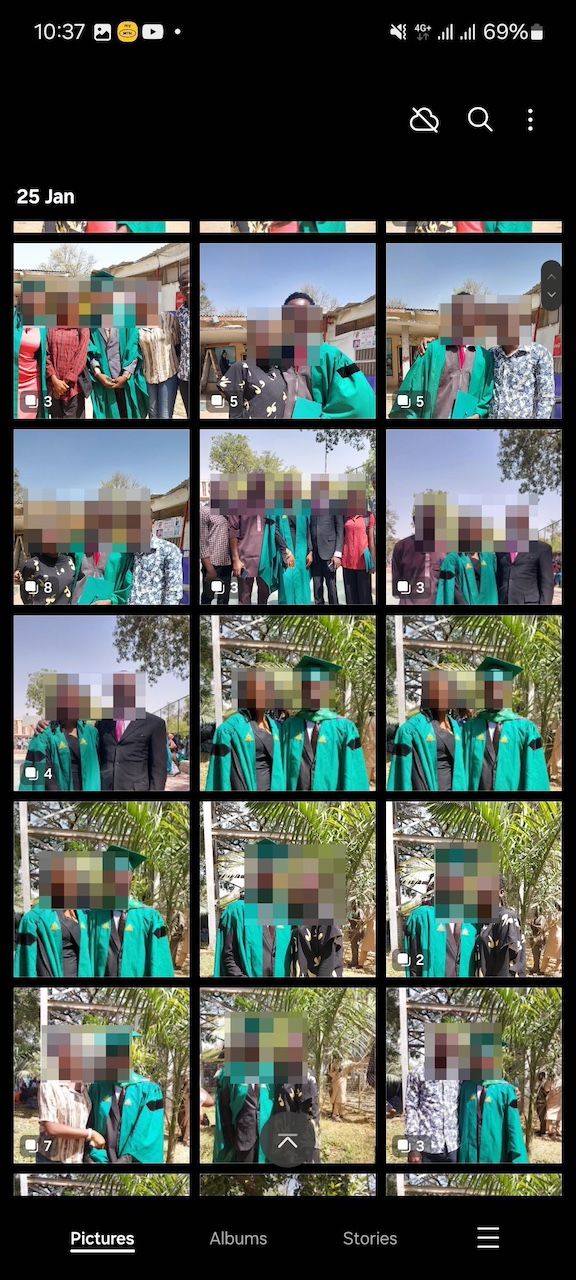
Both Google Photos and Samsung Gallery use a stacking feature to group similar photos taken in quick succession. Without it, snapping multiple shots at once can quickly clutter your gallery. With stacking enabled, those photos appear as a single thumbnail, marked by overlapping squares to indicate there’s more inside. Tapping the stack opens up the rest of the images.
From there, you can delete duplicates, archive the extras, or organize them into albums. In Google Photos, stacking requires backups to be turned on. Once that’s set, you can follow the steps below to enable the feature.
Stack images in Google Photos
- In the Photos menu, tap the three-dot icon in the upper-right corner.
- Tap the Stack similar photos toggle button.
Return to your photos and tap the images with tiny squares to expand and manage your stack.

Photos recommends top picks in your stacks. They are images Google thinks are the best versions of the group. They’re the sharpest ones with the best lighting, the least blur, and the clearest subject. Take your time to review them all and choose the ones you prefer.
Stack photos in Samsung Gallery
- Tap the three-dot icon in the upper-right corner.
- Select Group similar images. Gallery analyzes your images and arranges them.
- Tap any images with tiny squares to view and manage your stacks.

3- Hide sensitive content from public view
Not everything private has to be dramatic or scandalous—sometimes you just don’t want others seeing certain photos, and that’s reason enough to keep them hidden. It’s easy to accidentally reveal something while handing your phone to someone, even with the best intentions. Fortunately, Android offers several built-in options to keep your content private, depending on your device.
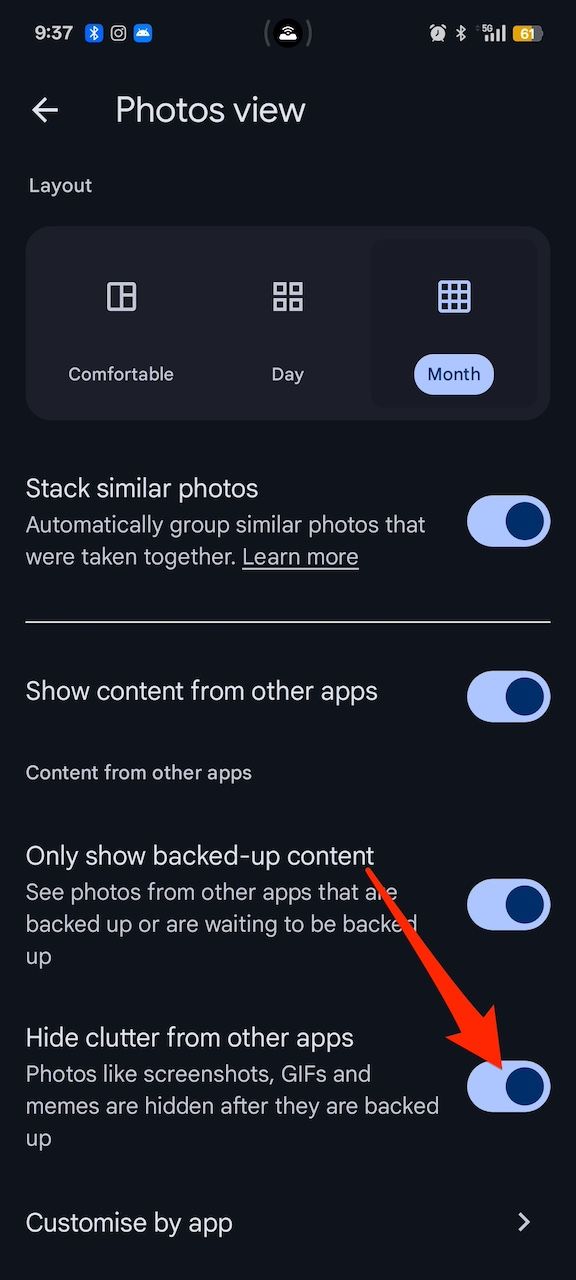
Google Photos includes a Locked Folder feature that secures selected photos and videos behind your screen lock. Samsung’s Gallery app takes it further with Secure Folder, using hardware-level encryption. On Pixel devices, Private Space allows you to create a separate user environment, including a private instance of Google Photos. You can also quickly hide clutter like memes and GIFs with a single tap.
Here’s how to set it up:
- In the Photos menu, tap the three-dot icon in the upper-right corner.
- Select Hide clutter from other apps.

4- Use file manager apps
For a deeper level of organization, moving photos and videos through a file manager can be more effective than just using your gallery app. Creating albums in your gallery only sets up visual shortcuts—the actual files remain in their original system folders. When you use a file manager to move media into different folders, you’re physically relocating the files on your device.
For example, media from a single trip might be scattered across WhatsApp downloads, camera photos, and screenshots. Placing them into one dedicated folder keeps everything in one place, which makes syncing to Google Drive or transferring to a computer much more organized.
Using a good file manager app helps streamline this process. Files by Google is a popular option, known for its simple interface and smart features like suggesting which files to delete—such as duplicates, blurry shots, or old screenshots. If you prefer a more desktop-like layout, XFolder offers a more hands-on experience for managing files on your phone.
5- Use cloud storage solutions
Cloud storage platforms like Dropbox, OneDrive, and Proton Drive offer a convenient way to store, access, and organize your files from anywhere. These services extend your phone’s storage by letting you create folders based on dates, events, or categories, rename files for easier access, and back everything up without stressing about local storage limits.
Google Drive is widely used—especially among Android users—due to its tight integration with Google Photos. However, it doesn’t offer end-to-end encryption, meaning Google retains access to your files and could technically review their contents.
Proton Drive, while newer, takes a different approach focused on privacy. Files are encrypted in a way that only you hold the decryption keys, so not even Proton can view your stored content. It also offers a dedicated photo backup feature, something most other cloud storage apps, including Google Drive, don’t provide.
Organization Begins Behind the Lens
Good habits start with awareness. Every photo you take, every screenshot you save, and every file you receive adds to your digital clutter. Over time, it builds up and becomes harder to manage.
Don’t wait until it’s overwhelming. While photo management apps can help, they’re only as effective as your involvement. Make it a habit to review your gallery regularly—ideally once a week or after a busy event. Go through your images, delete what you don’t need, sort the rest into folders, and back everything up. A little consistency goes a long way in keeping things organized.
Leave a Reply